Seasonal Craft Fair Checklist: What to Make, Pack, and Price
A practical, season-by-season checklist for local craft fairs, covering how much to make, what to pack,...

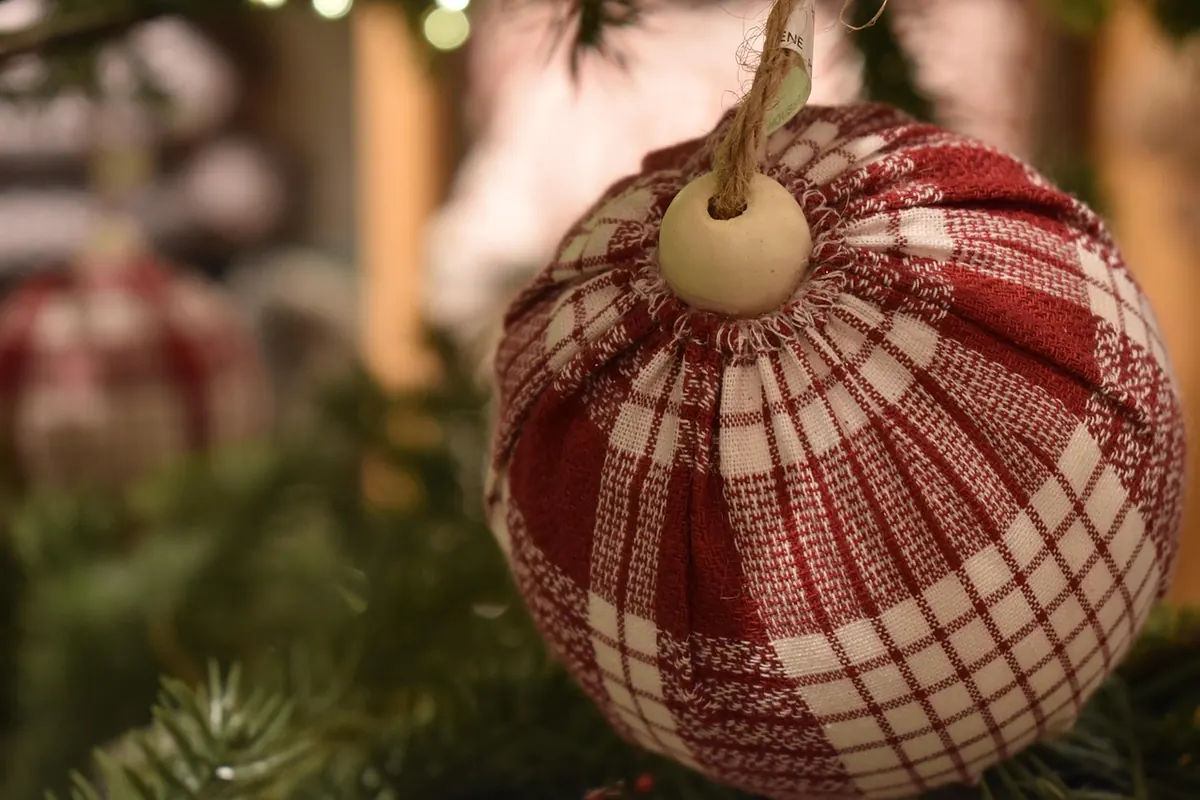
Every sewing box has one: the bag of offcuts too small for a quilt and too pretty for the bin. A corner of printed cotton. The last sleeve of a shirt you cut up in March. December is the right moment for that bag. These folded fabric ornaments need no machine, no pattern and no particular skill — just sharp scissors, a glue gun and an hour at the kitchen table. Make three and you will make twelve; the shape is that forgiving. Here is how to turn a handful of scraps into something worth hanging on the tree.
Nothing here is specialist, and most of it is probably already in a drawer. Set everything out before you start gluing, because once your fingers are sticky you will not want to be rummaging for the twine.
An iron matters more than it sounds. Scraps pulled from a bag are creased and limp; pressed flat, they fold crisply and the finished ornament looks deliberate rather than rumpled. Give each piece a quick press while you cut.
This is the workhorse shape: a layered circle of folded petals around a hidden cardboard core. It takes about twenty minutes once you have the rhythm, and it uses up scraps that are otherwise useless.
Start with a foam or polystyrene egg about 6 cm tall, or a ball if you prefer a round shape. Cut 3 cm fabric squares and fold each one diagonally, then fold the two outer corners in to meet the middle so you have a narrow pointed tab. Glue the tabs in overlapping rows from the bottom upwards, tucking each row under the one above, and finish with a loop at the top. Velvet and wool scraps are lovely here; the texture does most of the work.
The fastest of the three. Cut fabric into strips about 2 cm wide and wrap them around a foam ball, gluing the start, the overlaps and the finish as you go. Change direction every few strips so the ball does not look striped, and use up jersey, velvet or anything slightly stretchy that would misbehave in a folded shape. A ribbon loop glued at the top hides the last raw end.
Tightly woven quilting cotton is the easiest place to start: it creases sharply, holds a fold and takes glue well. Loose weaves such as burlap shed everywhere, and stretchy knits curl instead of folding flat — fine for wrapping, frustrating for petals. If a scrap frays the moment you cut it, either switch to pinking shears or run a thin line of fray-check along the edge and let it dry before folding.
Scale of print matters more than you might expect. A bold floral loses all its detail inside a 6 cm circle, so save the big patterns for wrapped baubles and use small prints, dots, ticking stripes and plain solids for folded work. A reliable palette is three fabrics plus one metallic or cream accent; anything more starts to look like a jumble from across the room.
Small dots beat long lines every time. A continuous bead of glue squeezes out at the edges, sets hard and shows through pale fabric. Press each piece for a slow count of ten before letting go, and keep a scrap of paper nearby to catch the fine strings a glue gun leaves behind.
Fabric glue gives you more working time and dries clear, which suits children and anyone who likes to adjust as they go; a glue gun is faster and holds stubborn folds instantly. If you use a glue gun, choose a low-temperature one where you can, keep it well away from small hands and pets, and let every ornament cool completely before hanging. Work in batches — cut all your circles, then fold all of them, then glue — and the whole project goes twice as quickly.
A finished ornament needs very little. A loop of kitchen twine reads rustic, narrow velvet ribbon reads traditional, and a strand of embroidery floss in a contrasting colour ties the palette together. A tiny bell or a single wooden bead threaded onto the loop adds a bit of weight so the ornament hangs straight rather than tilting.
They make good gift toppers, too: tie one to a wrapped parcel instead of a bow and it becomes part of the present. Slip a set of three into a small box with tissue paper and a handwritten note naming the fabric — "this one was your grandfather's shirt" turns a scrap into an heirloom.
Once the folding clicks, assemble a dozen in an evening: cut the circles one night, glue them the next. Store finished ornaments flat in an egg carton or a shallow shoebox lined with tissue, with a sheet of parchment between layers, and keep them away from damp — fabric glue softens in a cold garage over the summer.
Start with one ornament and a scrap you do not mind losing. If the first rosette comes out lopsided, unpick nothing, trim the edge with pinking shears and hang it at the back of the tree. By the third, your fingers will know the fold, and that bag of offcuts will look less like clutter and more like next December's decorations.
Photo: FlowerPower385 / Pixabay
A practical, season-by-season checklist for local craft fairs, covering how much to make, what to pack,...
Tension problems show up as tight chains, aching hands, and wobbly rows. Learn five common crochet tension...
A practical side-by-side look at frame looms and rigid heddle looms — what each costs, how hard it is to...